
A schedule for your order
Tooling, finishing and inspection included in your delivery schedule.
Bring Aria the thread, contact or connection requirement—not just a plastic shape to mold.
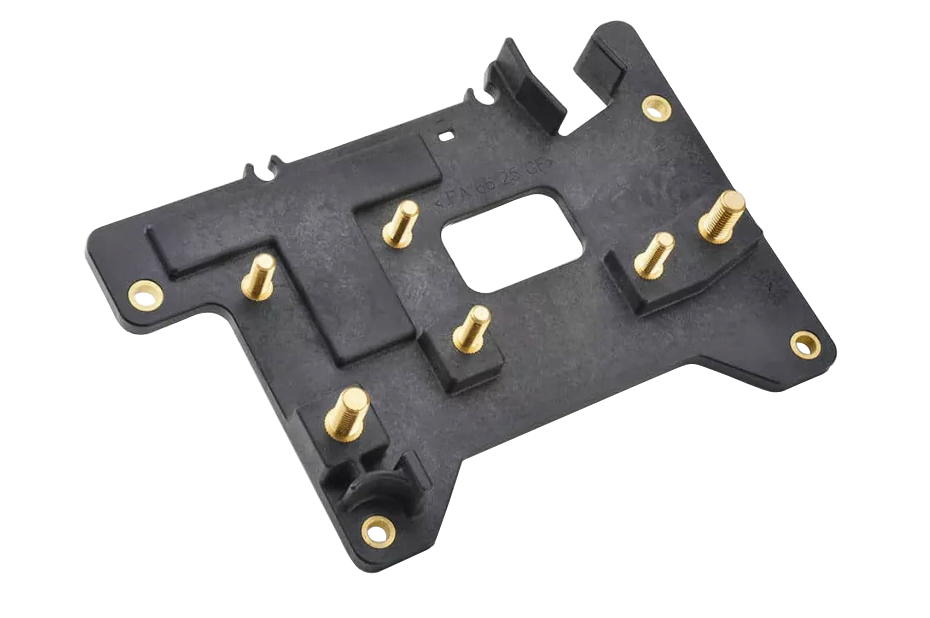


















The insert is part of your component’s function: a thread must remain usable, a contact must stay exposed and the connection must stay in position. Aria reviews the insert material, retention features and surrounding plastic together with your part drawing. That brings the assembly requirement into the mold discussion before the tool is made.
Our mold-making and injection molding services let you discuss the insert, tool and molded part within the same project. Mark the protected surfaces and any pull-out or torque acceptance requirements so they can be included in the agreed review and inspection scope.
Metal inserts can provide durable threads, electrical contacts or reinforcement. Define the insert material, exposed surfaces and retention features alongside the surrounding plastic geometry.
The tool supports the insert while resin flows around it. Accurate location, anti-rotation geometry and adequate plastic coverage help the finished part meet its assembly requirements.
Tooling, finishing and inspection included in your delivery schedule.
We review tool access, geometry and material choice before manufacturing.
Dimensional checks and inspection reports for the critical features on your drawing.
See how material, tooling and order quantity affect the cost of your parts.
Molded-in inserts can integrate threads, contacts or reinforcement while reducing later assembly steps. Their retention and location are designed into the molded component.
Insert molding combines plastic with threaded inserts, electrical contacts or bushings. Identify the insert material, exposed surfaces and retention requirements for the finished component.
The design of the part and the insert are created, and a mold is designed to produce the final product.
The pre-made insert is placed into the mold cavity or tool.
The mold is closed and held in place by clamps.
Molten plastic material is injected into the mold around the insert. The plastic material flows around the insert and fills the mold cavity, creating a secure bond between the insert and the plastic.
The plastic material is allowed to cool and solidify, forming a finished product with the insert securely embedded inside.
The finished product is removed from the mold. The key to successful insert molding is creating a strong bond between the insert and the plastic material. This is achieved by carefully selecting the materials and process parameters, such as the temperature, pressure, and injection speed. In some cases, the insert may be coated or treated with an adhesive to improve adhesion to the plastic material.
Bonding depends on the exact grades and surface preparation.
Reinforcement and other additives alter resin properties and processing behavior. Select the exact grade and color formulation before evaluating shrinkage, appearance or bonding.
Provide locating surfaces that allow the tool to hold the insert during filling. Mark threads and contact faces that must stay free of plastic.
The insert or substrate must retain its intended position and shape during molding. Review the material pair and local plastic thickness around the interface.
A multi-material component assigns different functions to its materials, such as structural support and soft contact. Materials may be introduced in separate stages; the process does not normally melt metal and plastic together.
The plastic must suit both the application and molding around the insert. Consider thermal movement, local wall thickness and stresses near the interface.
Compare tensile strength and elongation for the selected resin grade. The material data and the finished part test address different aspects of performance.
Tool material depends on resin abrasiveness, expected use, corrosion exposure and the required surface finish. Treat tool steel selection separately from the material used in the finished part.
The primary difference between them is that, in overmolding, the plastic material is injected directly onto a molded part or assembly; in insert molding, the plastic is first injected into a cavity and then the finished piece is inserted into another injection-molded part.
A: The insert molding process begins with the creation of a metal insert. This can be done through machining, die casting, or other processes depending on the product’s specifications. The insert is then placed into the injection mold tool before it is closed and secured. Molten plastic is then injected into the mold around the metal part until it cools and solidifies. Once the plastic cools, it is removed from the mold and any necessary finishing is performed before it’s ready to use in product assemblies. Get Your Free Quote About Insert Molding parts Today. Get Insert Molding Quotes Online All information and uploads are secure and confidential.
A: Plastic Insert Molding is a process used to create components with plastic and metal parts combined. It involves the injection of molten plastic surrounding a pre-made metal insert. Once the plastic cools, it forms around the insert for a finished product that combines both materials’ benefits.
Upload your CAD files and tell us the material and quantity you need.
Talk to an engineer